Adding a backend to SVAR DataGrid in Next.js
In Part 1 we built a Grid with local data. This guide shows how to connect the SVAR DataGrid to a SQLite database in Next.js. Grid will be able to load records from REST, save edits automatically via REST, and add row creation and deletion. The full code is on the backend branch of the react-grid-demo-nextjs repo.
Setting up SQLite
We'll use SQLite for the database. In this case we need no separate server, no Docker containers, and no config files. It stores data in a single file on disk, which makes it practical for demos and internal tools.
Install the package and its types:
npm install better-sqlite3
npm install -D @types/better-sqlite3
Define the table schema in src/lib/db.ts:
CREATE TABLE records (
  id INTEGER PRIMARY KEY AUTOINCREMENT,
  firstName TEXT DEFAULT '',
  lastName TEXT DEFAULT '',
  email TEXT DEFAULT '',
  city TEXT DEFAULT '',
  score INTEGER DEFAULT 0,
  birthday TEXT
);
birthday is a TEXT column because SQLite doesn't have a native date type. We store ISO strings and convert them to Date objects on the client. The database initializes lazily on first access, which avoids issues with Next.js build-time workers trying to open a database that doesn't exist yet. If the table is empty, the app inserts sample data so the grid isn't blank on first run.
Loading data from the server
The API route
Create a standard Next.js route handler at src/app/api/records/route.ts:
import { NextResponse } from "next/server";
import { getAllRecords, createRecord } from "@/lib/db";

export async function GET() {
  const records = getAllRecords();
  return NextResponse.json(records);
}
Loading data on the client
Install the data provider package:
npm install @svar-ui/grid-data-provider
Replace the hardcoded data array with RestDataProvider:
const server = useMemo(() => new RestDataProvider("/api/records", normalize), []);

useEffect(() => {
  server.getData().then((records) => {
    setData(records as IRow[]);
  });
}, [server]);
Pass normalize as the second argument. It runs on each record after fetch. Define it to convert ISO date strings back to Date objects:
function normalize(record: Record<string, unknown>) {
  if (record.birthday) {
    record.birthday = new Date(record.birthday as string);
  }
}
RestDataProvider fetches the endpoint, runs normalize on each record, and returns ready-to-use data.
Enabling write operations
For writes, the API needs to expose the full REST surface:
| Method | Endpoint | Purpose |
|---|---|---|
| GET | /records | Get all records |
| POST | /records | Create record |
| PUT | /records/{id} | Update record |
| PATCH | /records/{id} | Update single field |
| DELETE | /records/{id} | Delete record |
POST returns { "id": 123 } so the client can update its local ID. DELETE returns {}. PATCH handles cell editing. It expects { "key": "fieldName", "value": "newValue" }.
Connecting the provider to the Grid
Pass server to setNext inside the init callback to activate the integration:
const init = useCallback((gridApi: IApi) => {
  api.current = gridApi;
  gridApi.setNext(server);
}, [server]);
setNext connects the provider to the Grid's action pipeline. The Grid emits actions like add-row, update-cell, and delete-row. The provider maps those to POST, PATCH, and DELETE. It also handles updating local IDs after the server assigns them. You don't need manual fetch calls or custom event handlers.
Adding buttons to toolbar
Add toolbar buttons to let users create and delete records:
<div style={{ display: "flex", gap: 10, marginBottom: 10 }}>
  <Button onClick={() => api.current!.exec("add-row", { row: {} })}>
    Add Row
  </Button>
  {dataToEdit && (
    <Button onClick={() => api.current!.exec("delete-row", { id: dataToEdit.id })}>
      Delete Selected Row
    </Button>
  )}
</div>
The "Add Row" button fires add-row with an empty object. The server assigns the ID and defaults.
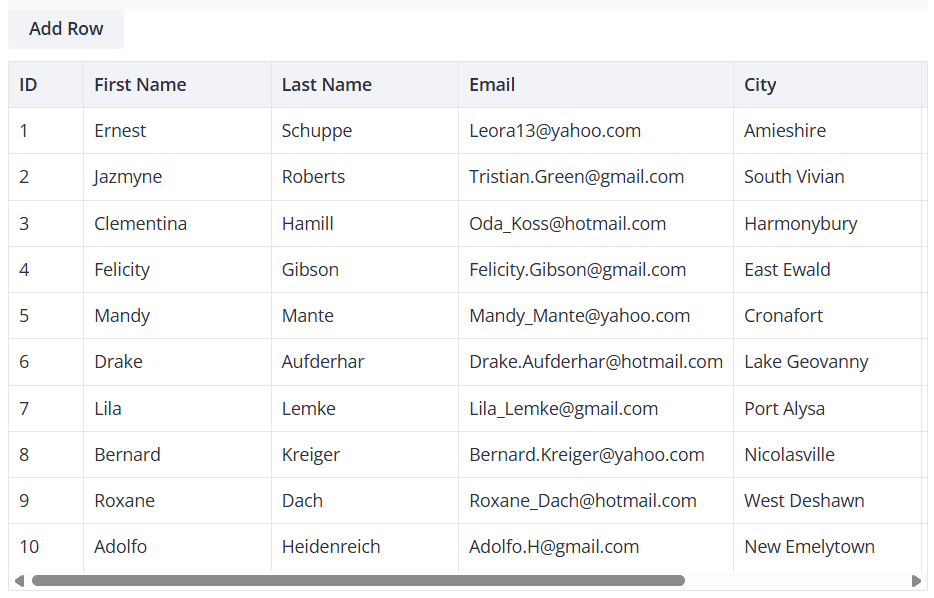
The "Delete Selected Row" button only appears when the user selects a row. Both actions go through the same pipeline and reach the backend automatically.
Handling errors
Handle loading failures
getData() returns a promise. Add a .catch() to handle network or database errors:
server.getData()
  .then((records) => {
    setData(records as IRow[]);
  })
  .catch((error) => {
    console.error("Failed to load data:", error);
  });
Handle save failures
Don't rely on the server as your validation layer. Validate on the client and prevent bad data before it leaves the browser.
Server errors should be rare. When they do occur, notify the user and offer to reload fresh data from the database. That keeps the UI in sync without complex reconciliation logic.
The full component
The following snippet shows the complete DataGrid.tsx with all features integrated:
"use client";

import { useState, useEffect, useRef, useMemo, useCallback } from "react";
import type { IColumnConfig, IApi, IRow } from "@svar-ui/react-grid";
import { Grid, getEditorConfig, Willow } from "@svar-ui/react-grid";
import { DatePicker, Button } from "@svar-ui/react-core";
import { Editor, registerEditorItem } from "@svar-ui/react-editor";
import { RestDataProvider } from "@svar-ui/grid-data-provider";
import "@svar-ui/react-grid/all.css";

registerEditorItem("datepicker", DatePicker);

const apiUrl = "/api/records";

function normalize(record: Record<string, unknown>) {
  if (record.birthday) {
    record.birthday = new Date(record.birthday as string);
  }
}

const columns: IColumnConfig[] = [
  { id: "id", width: 60, header: "ID", sort: true },
  { id: "firstName", header: "First Name", width: 150, sort: true, editor: "text" },
  { id: "lastName", header: "Last Name", width: 150, sort: true, editor: "text" },
  { id: "email", header: "Email", width: 220, editor: "text" },
  { id: "city", header: "City", width: 150, sort: true, editor: "text" },
  { id: "score", header: "Score", width: 100, sort: true },
  { id: "birthday", header: "Birthday", width: 150, editor: "datepicker" },
];

export default function DataGrid() {
  const [mounted, setMounted] = useState(false);
  const [data, setData] = useState<IRow[]>([]);
  const api = useRef<IApi | null>(null);
  const [dataToEdit, setDataToEdit] = useState<IRow | undefined>(undefined);
  const items = useMemo(() => getEditorConfig(columns), []);

  const server = useMemo(() => new RestDataProvider(apiUrl, normalize), []);

  useEffect(() => {
    setMounted(true);
    server.getData().then((records) => {
      setData(records as IRow[]);
    });
  }, [server]);

  const init = useCallback((gridApi: IApi) => {
    api.current = gridApi;
    gridApi.setNext(server);
  }, [server]);

  if (!mounted) {
    return null;
  }

  return (
    <div>
      <Willow>
        <div style={{ display: "flex", gap: 10, marginBottom: 10 }}>
          <Button onClick={() => api.current!.exec("add-row", { row: {} })}>
            Add Row
          </Button>
          {dataToEdit && (
            <Button onClick={() => api.current!.exec("delete-row", { id: dataToEdit.id })}>
              Delete Selected Row
            </Button>
          )}
        </div>
        {dataToEdit && (
          <Editor
            values={dataToEdit}
            items={items}
            placement="sidebar"
            autoSave={true}
            onChange={({ key, value }) => {
              api.current!.exec("update-cell", {
                id: dataToEdit!.id,
                column: key,
                value,
              });
            }}
            onAction={() => setDataToEdit(undefined)}
          />
        )}
        <Grid
          data={data}
          columns={columns}
          select={true}
          init={init}
          onSelectRow={(ev) => setDataToEdit(api.current!.getRow(ev.id))}
        />
      </Willow>
    </div>
  );
}
What we built
Starting from a client-only Grid, the backend adds:
- Data loading via
RestDataProvider.getData(): fetches records from the API and runsnormalizeon each one - Automatic saves through
api.setNext(server): connects the provider to the Grid's action pipeline so every action maps to a REST call - Cell-level updates via PATCH: handles cell-level updates without sending the full record
- Add/delete UI with buttons that work through the same pipeline
The data provider handles the hard part. You implement standard REST endpoints with whatever database you want, and the Grid handles the rest.